
The Best Citronella Candle Recipe To Make This Summer (I Use Coconut Wax)

Updated: Jul 22
I've been making my own candles for a few years now, I actually had a small candle business once upon a time. I love this citronella version I make every single summer. I enjoy burning these outside on still summer evenings. Many people find citronella candles help make sitting outdoors more pleasant, although homemade citronella candles won't completely prevent mosquito or midge bites, and their effectiveness depends heavily on wind and other conditions.
The recipe below uses coconut wax, which I'll explain in a minute. It makes roughly two medium jar candles, each about 200ml -- enough to get you through a good chunk of the season if you're storing them properly between uses.

Why coconut wax and not soy or paraffin
Soy wax is the obvious alternative and it's perfectly fine. I used it for years. But coconut wax holds fragrance better, burns more cleanly, and has a lower melt point -- which actually helps in summer because it throws scent into the air more readily in warm weather. It's also a natural wax, which matters to me.
Paraffin is what most cheap candles use. It burns fine, but the scent throw tends to be sharper and shorter, and it produces more soot. For something you're burning outside you probably wouldn't notice, but given the choice I'd rather not use it.
Coconut wax costs a bit more than soy -- around £8 to £12 for 500g depending on where you buy it. One batch of this recipe uses about 350g, so one bag gets you well over a batch.
What you'll need
For two candles at roughly 200ml each, here's the kit list:
350g coconut wax (a container blend works best for jars) Two glass jars, ideally 200ml or 250ml mason jars or similar
Two cotton wicks pre-tabbed to fit your jar diameter (for a jar around 7cm wide, a medium wick tends to work)
A pouring jug or heatproof bowl
A thermometer (a basic digital one is fine, nothing fancy)
A double boiler setup (a saucepan with a few inches of water and a bowl on top)
Citronella fragrance oil, 5 to 6% of the total wax weight, so about 17 to 20ml for this batch
Wick holders or two pencils to keep the wicks centred while the wax sets.
You don't need a thermometer gun, you don't need an expensive scale, and you definitely don't need the £40 candle-making kits that come with half the things you'll never touch again.
A standard kitchen scale, a digital thermometer you might already own, and that double boiler setup are all you're working with here.

The recipe, step by step
Step 1: Set up your jars - Stick the wick tabs to the bottom centre of each jar using a small dot of superglue or the adhesive that comes with pre-tabbed wicks. Thread the wick up through a pencil or wick holder resting across the top of the jar. You want the wick centred and taut before the wax goes in.
Step 2: Melt the wax - Put your wax in the heatproof bowl over a pan of simmering water. Keep the heat medium-low. Coconut wax melts at around 51 to 53°C, so it doesn't take long. Stir occasionally and keep an eye on your thermometer.
Step 3: Add the fragrance oils - Once the wax is fully melted, take the bowl off the heat and let it cool to around 54 to 57°C before adding your oils. Stir in your citronella oil at this point, slowly, for at least two minutes. This is worth doing properly -- if you rush it, the fragrance doesn't bind evenly and you get patchy scent throw.
Step 4: Pour - Pour slowly into your prepared jars, leaving about 1.5cm from the top. The wax will look slightly cloudy as it cools -- that's normal for coconut wax. Don't move the jars once you've poured.
Step 5: Leave to cure - This is the bit people skip, and it's a mistake. Coconut wax candles benefit from a 48-hour cure before the first burn. The scent binds more firmly and the burn is more even. Leave them at room temperature, not in the fridge.
Step 6: Trim and burn - Trim the wick to about 5mm before the first burn. Too long and you'll get a large, sooty flame that burns through the wax too fast.
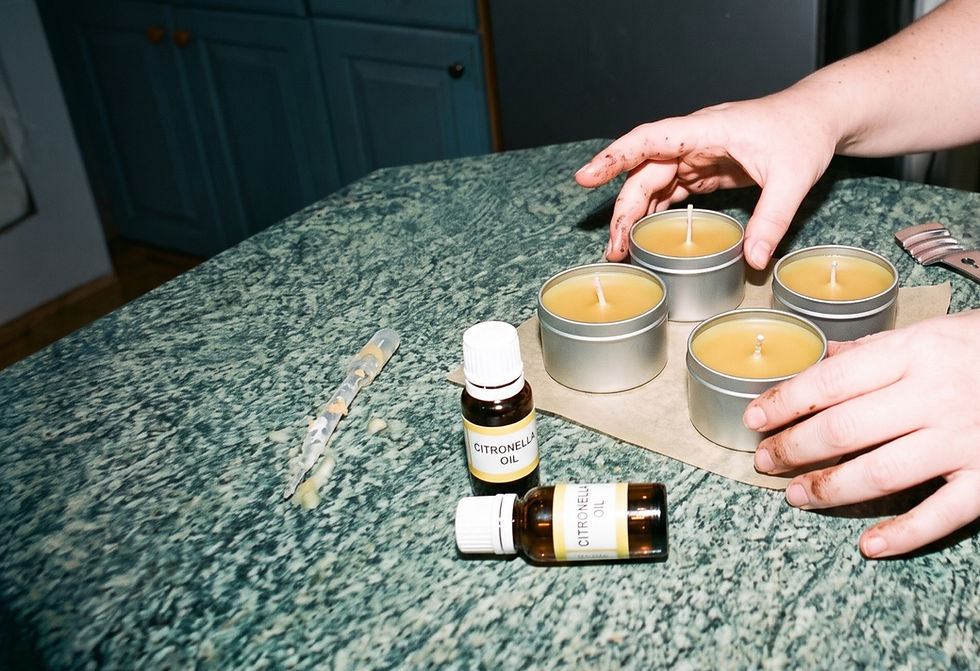
The citronella percentage question
A lot of recipes you'll find online go very light on the citronella oil -- around 2 to 3%. That will produce a candle that smells nice but won't do much about mosquitoes. Check the maximum fragrance load recommended by your wax manufacturer. Many coconut container waxes perform well around 5–8%, but always stay within the wax manufacturer's limits.
I've tested a few different ratios and settled on 5 to 6% citronella.
To say it plainly: no candle is going to eliminate mosquitoes or midges from a large outdoor space. Wind is your enemy. If you're on a breezy terrace the smoke and scent disperse too fast to do much. These work best on a still evening around a small table.
Getting the scent right
Citronella on its own is quite sharp and lemony. Some people like that; some find it harsh. A few things will soften it without reducing the repellent effect.
Adding lemon eucalyptus (as above) rounds it out and adds a slightly medicinal note that I actually like. A small amount of cedarwood oil -- around 3 to 4ml per batch -- blends well with citronella and may have some insect-deterring properties of its own, though the evidence is less established than it is for PMD. It also makes the whole scent profile smell less like a cleaning product.
Avoid floral additions. Rose or lavender don't really work alongside citronella -- the scents fight each other and you end up with something that smells like a confused bath product.

A note on coconut wax behaviour
Coconut wax does a few things that soy wax doesn't, and if you're not expecting them you'll think something's gone wrong.
It can develop a slightly bumpy or uneven surface on top as it sets. This is normal and doesn't affect the burn at all. If it really bothers you, a very quick blast with a heat gun evens it out.
It can also "sweat" slightly in warm weather, meaning tiny oil droplets appear on the surface. This is normal and doesn't mean your candle is ruined -- it's just the oils in the wax responding to temperature change. Store them somewhere cool and out of direct sunlight.
First burns matter more with coconut wax than with other types. Let the wax pool reach all the way to the edges of the jar on the first burn before you blow it out. With a 200ml jar that's usually about two hours. If you don't do this you'll get tunnelling, where the wax burns straight down the middle and leaves a thick ring of unused wax around the sides.
Once you've got the first burn right, the rest of the candle tends to behave itself. These typically last around 30 to 35 hours of burn time at 200ml, which across a UK summer is a pretty good return on about an hour of making time.
Key Safety Checks
Container Choice: Ensure the 200ml jars you are using are heavy-walled, seamless glass, specifically rated for high heat (like Mason or Ball jars).
Fragrance Safety: Check the specific Citronella oil bottle you are using. Make sure it is labeled as "Skin Safe / Candle Safe." Pure, undiluted essential oils can sometimes be too strong or caustic for standard cotton wicks.
Burn Time Rules: Never burn the candle down to the bottom. Once it gets down to the last 1 to 2cm of wax, stop using it to prevent the glass from shattering.
Disclaimer: The information provided in this blog post is for educational and entertainment purposes only. Candle making involves working with high heat, open flames, and melted wax, which carry inherent risks of burns, fire, and property damage. While this recipe reflects my personal experience and process, safety outcomes depend entirely on your materials, equipment, and handling. Always follow the specific safety instructions provided by your wax, fragrance, and wick manufacturers, use heat-safe containers, and never leave a burning candle unattended.
Please note: This recipe is for DIY candles for personal use only. If selling/advertising your candles as insect-repellent in any way, you need to have your product assessed and registered with The Health & Safety Executive (HSE for short) as they are regulated by the HSE and advertising any product as an insect-repellent without seeking assessment or registration could get you in trouble.
By using this recipe, you agree that the author and blog owners assume no liability for any injury, loss, or damage resulting from your candle-making activities or the use of the finished products.


Comments