
How to Make DIY Fabric Pumpkins From Old Jumpers (Almost Free Halloween Decorations!)

Updated: Oct 17
I've always thought there's something rather ridiculous about buying brand-new decorations to make your home look rustic.
This autumn, I've been making DIY fabric pumpkins from old knitted jumpers, stuffing them with filling rescued from unwanted cushions and pillows, and finishing them with little sticks for stems.
And the best bit?
They cost practically nothing to make.
Just a few old jumpers, some rescued stuffing, a needle, thread and a little imagination.
If you've got an old jumper that's beyond repair, this is such a lovely way to give it one last purpose.
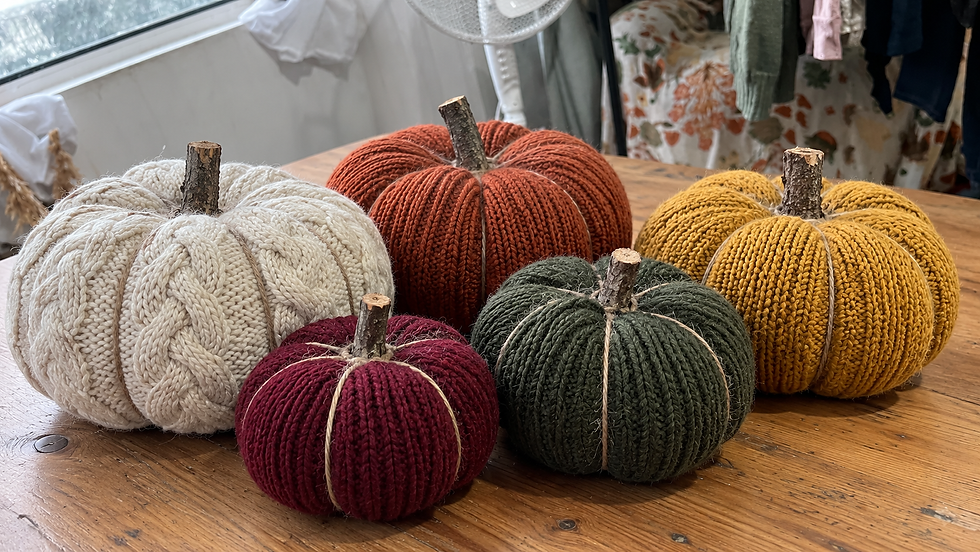
Why I'm Making Halloween Decorations From Old Clothes
As some of you might know, I run a small preloved clothing business from home.
Most of the clothing I buy is sorted, cleaned, photographed and listed for resale.
But inevitably, when you're dealing with second-hand clothes, there are pieces that simply aren't suitable for selling.
A jumper might have a hole that isn't worth repairing. Another might have a stubborn stain, or perhaps the fabric has become too worn to be useful as clothing.
And while I always try to find a way to reuse or repair things first, there will occasionally be pieces that really have reached the end of their wearable life.
But that doesn't mean the fabric itself is completely useless.
In fact, old knitted jumpers are absolutely wonderful for making autumn decorations.
So rather than buying new Halloween decorations this year, I thought I'd see what I could make from materials we already had.
After making my autumn fabric wreath, I decided to try something different.
Little knitted pumpkins.
And they're surprisingly easy.

Why Old Knitted Jumpers Make Beautiful Pumpkins
There's something about knitwear that just feels like autumn.
Chunky cable knits, soft woolly textures, muted colours and slightly oversized stitches.
They remind me of cold mornings, warm drinks and digging out your favourite jumper for the first time in months.
Cream jumpers make beautiful neutral pumpkins. Burnt orange is perfect for traditional Halloween decorating, while mustard yellow, forest green, brown and burgundy all work wonderfully together.
You don't even have to use plain knitwear.
A striped jumper or an interesting cable-knit pattern could make something completely different.
And because you're working with old clothing, every pumpkin is going to look a little different.
What You'll Need to Make Your Own Fabric Pumpkins
You really don't need much for this project.
Materials:
An old knitted jumper that's no longer suitable for wearing
Stuffing from old cushions, pillows or other unwanted soft furnishings
A needle and strong thread
Sharp fabric scissors
Thick string, cotton cord or twine
Small dry sticks or twigs for pumpkin stems
Optional fabric glue to help secure the stems
That's it.
You can make several pumpkins from one jumper, depending on its size and how large you'd like your pumpkins to be.
And if you already have these things at home, your materials could cost absolutely nothing.
Just make sure any fabric and stuffing you reuse is clean, completely dry and in a suitable condition for crafting.
How to Make DIY Pumpkins From Old Jumpers
Step 1: Choose Your Old Jumpers
Start by gathering any knitted jumpers that are too damaged or worn to be repaired, donated or resold.
For my pumpkins, I love the idea of mixing different knit textures and autumnal colours.
Cream, beige, rust, mustard and brown look especially lovely together.
But you could also make a whole collection of white knitted pumpkins for a softer, neutral cottagecore look.
Have a look at the different parts of your jumper before cutting.
The sleeves can be particularly useful for making smaller pumpkins, while the body of the jumper gives you enough fabric to make larger ones.
Try to work around any damaged sections where possible.
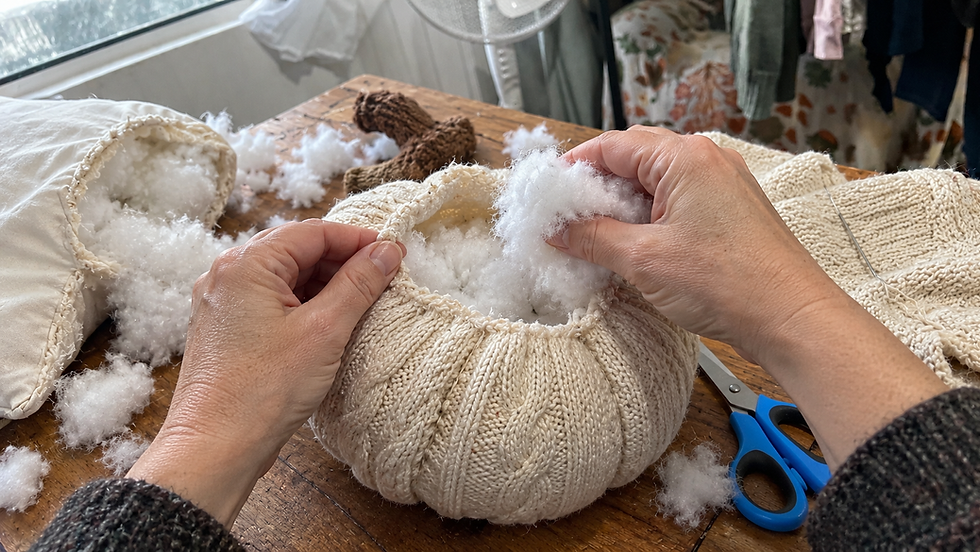
Step 2: Cut Your Jumper Into Sections
Decide how big you'd like your pumpkin to be.
You can make tiny pumpkins for shelves and windowsills, medium-sized ones for a table display, or larger ones to sit beside a fireplace.
For a simple method, cut a rectangular section of knitted fabric.
Fold it so the right sides are facing each other, then stitch the side edges together to create a tube.
Alternatively, you can use an existing jumper sleeve and cut a section from it.
If the knitted fabric starts to unravel when you cut it, use small securing stitches along the cut edges.
The measurements don't need to be exact.
A slightly different shape or size will simply give your finished pumpkins a bit more character.
Step 3: Stitch the Bottom Closed
Turn your fabric tube so the outside of the knit is facing out.
Using a strong needle and thread, make a running stitch around one open end.
Pull the thread gently to gather the fabric together.
Once the opening is closed, add a few extra stitches to secure it.
This will become the bottom of your pumpkin.

Step 4: Fill Your Pumpkin With Old Cushion Stuffing
Now for the part that really makes it take shape.
Rather than buying new polyester stuffing, I'm using filling from old cushions and pillows that we no longer need.
It's a brilliant way to reuse something that would otherwise be thrown away.
Take small handfuls of stuffing and push them into your knitted fabric.
Keep adding more until it begins to form a lovely rounded sphere.
You want it to be reasonably full, but not so tightly packed that it becomes hard to shape.
The trick is to create something soft and round that you can still squash slightly with your hands.
Step 5: Stitch the Top of Your Pumpkin Closed
Once you're happy with the amount of stuffing, gather the fabric at the top.
Using your needle and thread, stitch around the opening and pull the fabric together.
Secure it with several stitches.
You should now have a stuffed knitted sphere.
Step 6: Use Thick String to Create the Pumpkin Shape
This is my favourite part of the whole project because it's where your stuffed ball suddenly starts looking like an actual pumpkin.
Take a length of strong, thick string or cotton cord.
Start at the top centre of your pumpkin, run the string down the outside, underneath the base and back up to the top.
Pull it gently until the string creates a little indentation in the fabric.
Secure it at the top, then repeat in another direction.
Continue rotating the string around your pumpkin, creating several sections.
Think of the natural ridges running from the top of a real pumpkin down to the bottom.
That's the shape you're trying to recreate.
You can make six or eight sections, depending on the size of your pumpkin and how pronounced you'd like the ridges to be.
My tip: Don't pull the string so tightly that it damages the knitted fabric. You only need enough tension to create those lovely rounded pumpkin sections.
Once you've finished, tie the string securely and tuck any loose ends out of sight.
You'll now have a proper little knitted pumpkin!
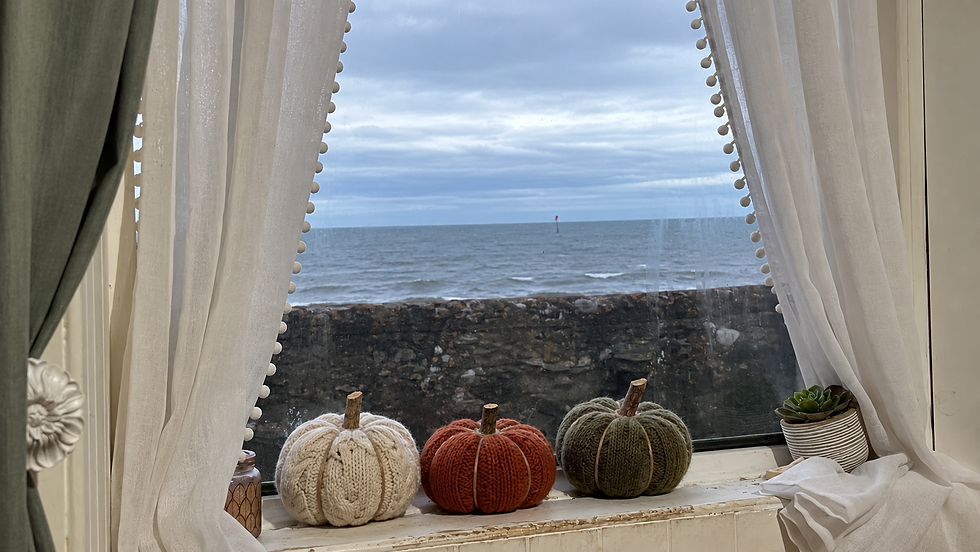
Step 7: Add a Natural Stick for the Stem
For the finishing touch, I like to use a little stick or twig from the garden.
Choose a short, dry piece of wood that's roughly the right size for your pumpkin.
Trim away any sharp edges and make sure it's clean and free from insects.
Position it in the gathered fabric at the top of your pumpkin.
You can secure it with a few stitches around the base or a small amount of suitable craft glue.
I love using real twigs because no two are exactly alike.
They give the pumpkins a lovely natural, rustic appearance.
And that's it.
You've made your very own autumn pumpkin from an old jumper.
One of the things I love most about living in an old cottage is that handmade things seem to fit naturally into the space.
And I particularly like knowing that these pumpkins started life as something else.
All things that might otherwise have been forgotten or thrown away.
Now they've become something we can bring out every autumn.
And I think that's rather lovely.
If you've got an old knitted jumper hiding at the back of your wardrobe, why not give this little project a try?
You don't need to be brilliant at sewing, you don't need expensive supplies, and your pumpkins certainly don't need to be perfect.
A Little Note About My Images ♡
You'll notice that the images across my blog are a mixture of my own photography and AI-generated images.
I'm a one-woman band running this little corner of the internet, without a team of photographers, designers or editors behind me. Living with OCD also means I can be particularly careful about things like copyright and image permissions, so I sometimes use AI to help bring my ideas to life without those additional worries.
Where possible, I love sharing my own photographs, especially glimpses of my cottage, garden and everyday life here in Scotland. Other times, I'll use AI-generated imagery to illustrate an idea or provide a little creative inspiration.
I believe in being transparent, so I wanted you to know that you'll find a mixture of both throughout my website. The words, experiences, opinions and ideas are my own.
Thank you for supporting my little one-woman blog! ❤️


Comments